Answer
Jul 14, 2023 - 12:32 PM
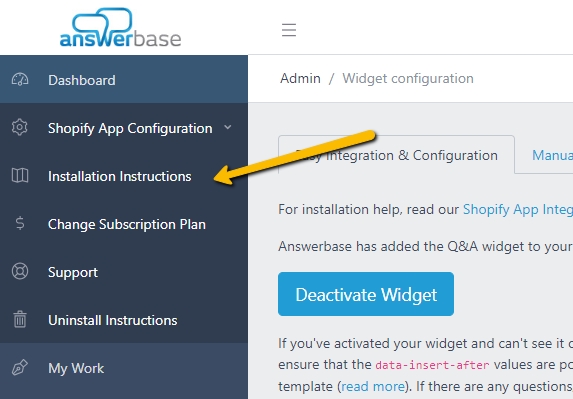
You can determine where to place your widget on your Shopify page by going into the Answerbase Shopify Installation area as seen here in your app navigation:

Within that section, you'll find a field where you can identify the CSS selection that you would like your widget to be placed under...see here:

This attribute will be used if you want to insert the widget AFTER the element of reference you define as the attribute. This attribute represents a "CSS selector", which means you can use an ID of an element, a CLASS NAME or any other CSS-style way of identifying an element. For example, if you specify "#description" as its value, it means you want to use the element whose ID equals "description" as a reference. If you specify ".description", it means you want to use the element that includes "description" as one of its classes. If you define this attribute, you should not define the "data-insert-before" attribute, as only one of them can be used.
If you don't have an existing DIV that works for your desired placement, you can add a new div in your template with the id of "answerbase" (or whatever you'd like) so our widget can recognize that position and insert the widget after it.
Similarly, with our "call to action widget" which will show users on the top of the page that the Q&A engagement is available and the number of questions that have been answered....you can assign where that is going to be placed in another field on that settings page as seen here:

Similar to the Q&A widget as mentioned above, you'll define the CSS selector where you want the widget to show after and save that.
To test the new placement you should clear your cache and open an incognito window, and you should be able to see the desired result.
You can see all of the Shopify Q&A settings and descriptions of what they do in our documentation Answerbase Easy Integration & Configuration Guide for Shopify Product Questions & Answers.

Within that section, you'll find a field where you can identify the CSS selection that you would like your widget to be placed under...see here:

This attribute will be used if you want to insert the widget AFTER the element of reference you define as the attribute. This attribute represents a "CSS selector", which means you can use an ID of an element, a CLASS NAME or any other CSS-style way of identifying an element. For example, if you specify "#description" as its value, it means you want to use the element whose ID equals "description" as a reference. If you specify ".description", it means you want to use the element that includes "description" as one of its classes. If you define this attribute, you should not define the "data-insert-before" attribute, as only one of them can be used.
If you don't have an existing DIV that works for your desired placement, you can add a new div in your template with the id of "answerbase" (or whatever you'd like) so our widget can recognize that position and insert the widget after it.
Similarly, with our "call to action widget" which will show users on the top of the page that the Q&A engagement is available and the number of questions that have been answered....you can assign where that is going to be placed in another field on that settings page as seen here:

Similar to the Q&A widget as mentioned above, you'll define the CSS selector where you want the widget to show after and save that.
To test the new placement you should clear your cache and open an incognito window, and you should be able to see the desired result.
You can see all of the Shopify Q&A settings and descriptions of what they do in our documentation Answerbase Easy Integration & Configuration Guide for Shopify Product Questions & Answers.

